

Microsoft Dynamics 365 Sales
Who is this for?
- For administrators managing the company's integrations.
Permissions and licenses
- Administrator rights on your Leexi and Microsoft accounts.
- A Microsoft account with the Global Administrator or Privileged Role Administrator role to grant consent.
- License required: depending on your plan, check availability in Settings > Integrations.
How to use it
Grant admin consent
- Open the following URL in your browser: https://login.microsoftonline.com/common/adminconsent?client_id=34cbe9bd-0bba-4c64-abfa-ab6b73fecb5d
- Sign in with an account that has Global Administrator or Privileged Role Administrator permissions.
- Click Accept to grant consent.
Register the Leexi application user in Dynamics
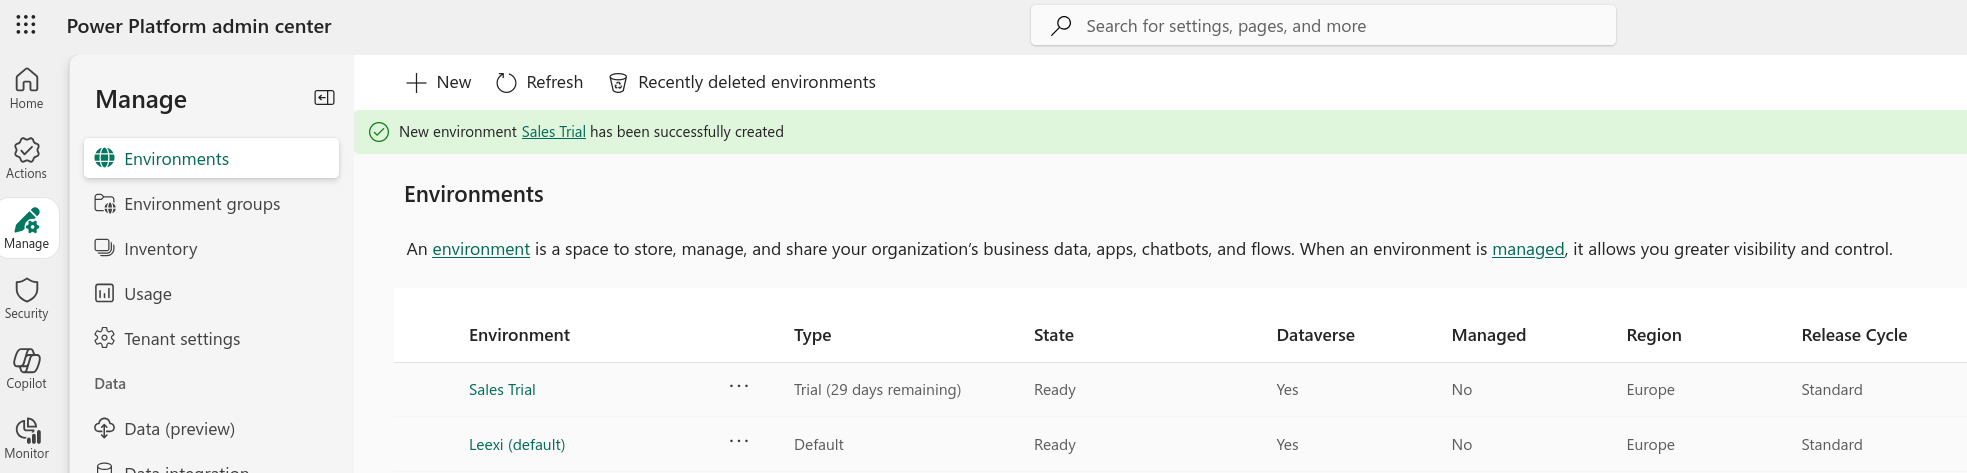
- Go to the Power Platform Admin Center.
- Go to Environments and select your Dynamics environment.
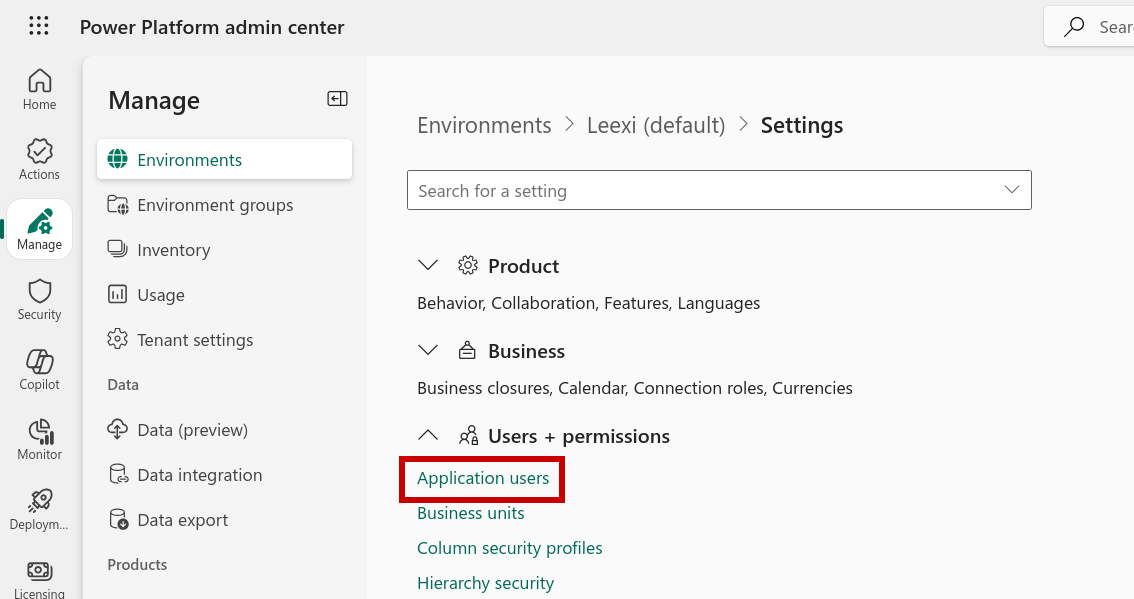
- Click Settings (top bar), then Users + permissions and Application users.

- Click + New app user.

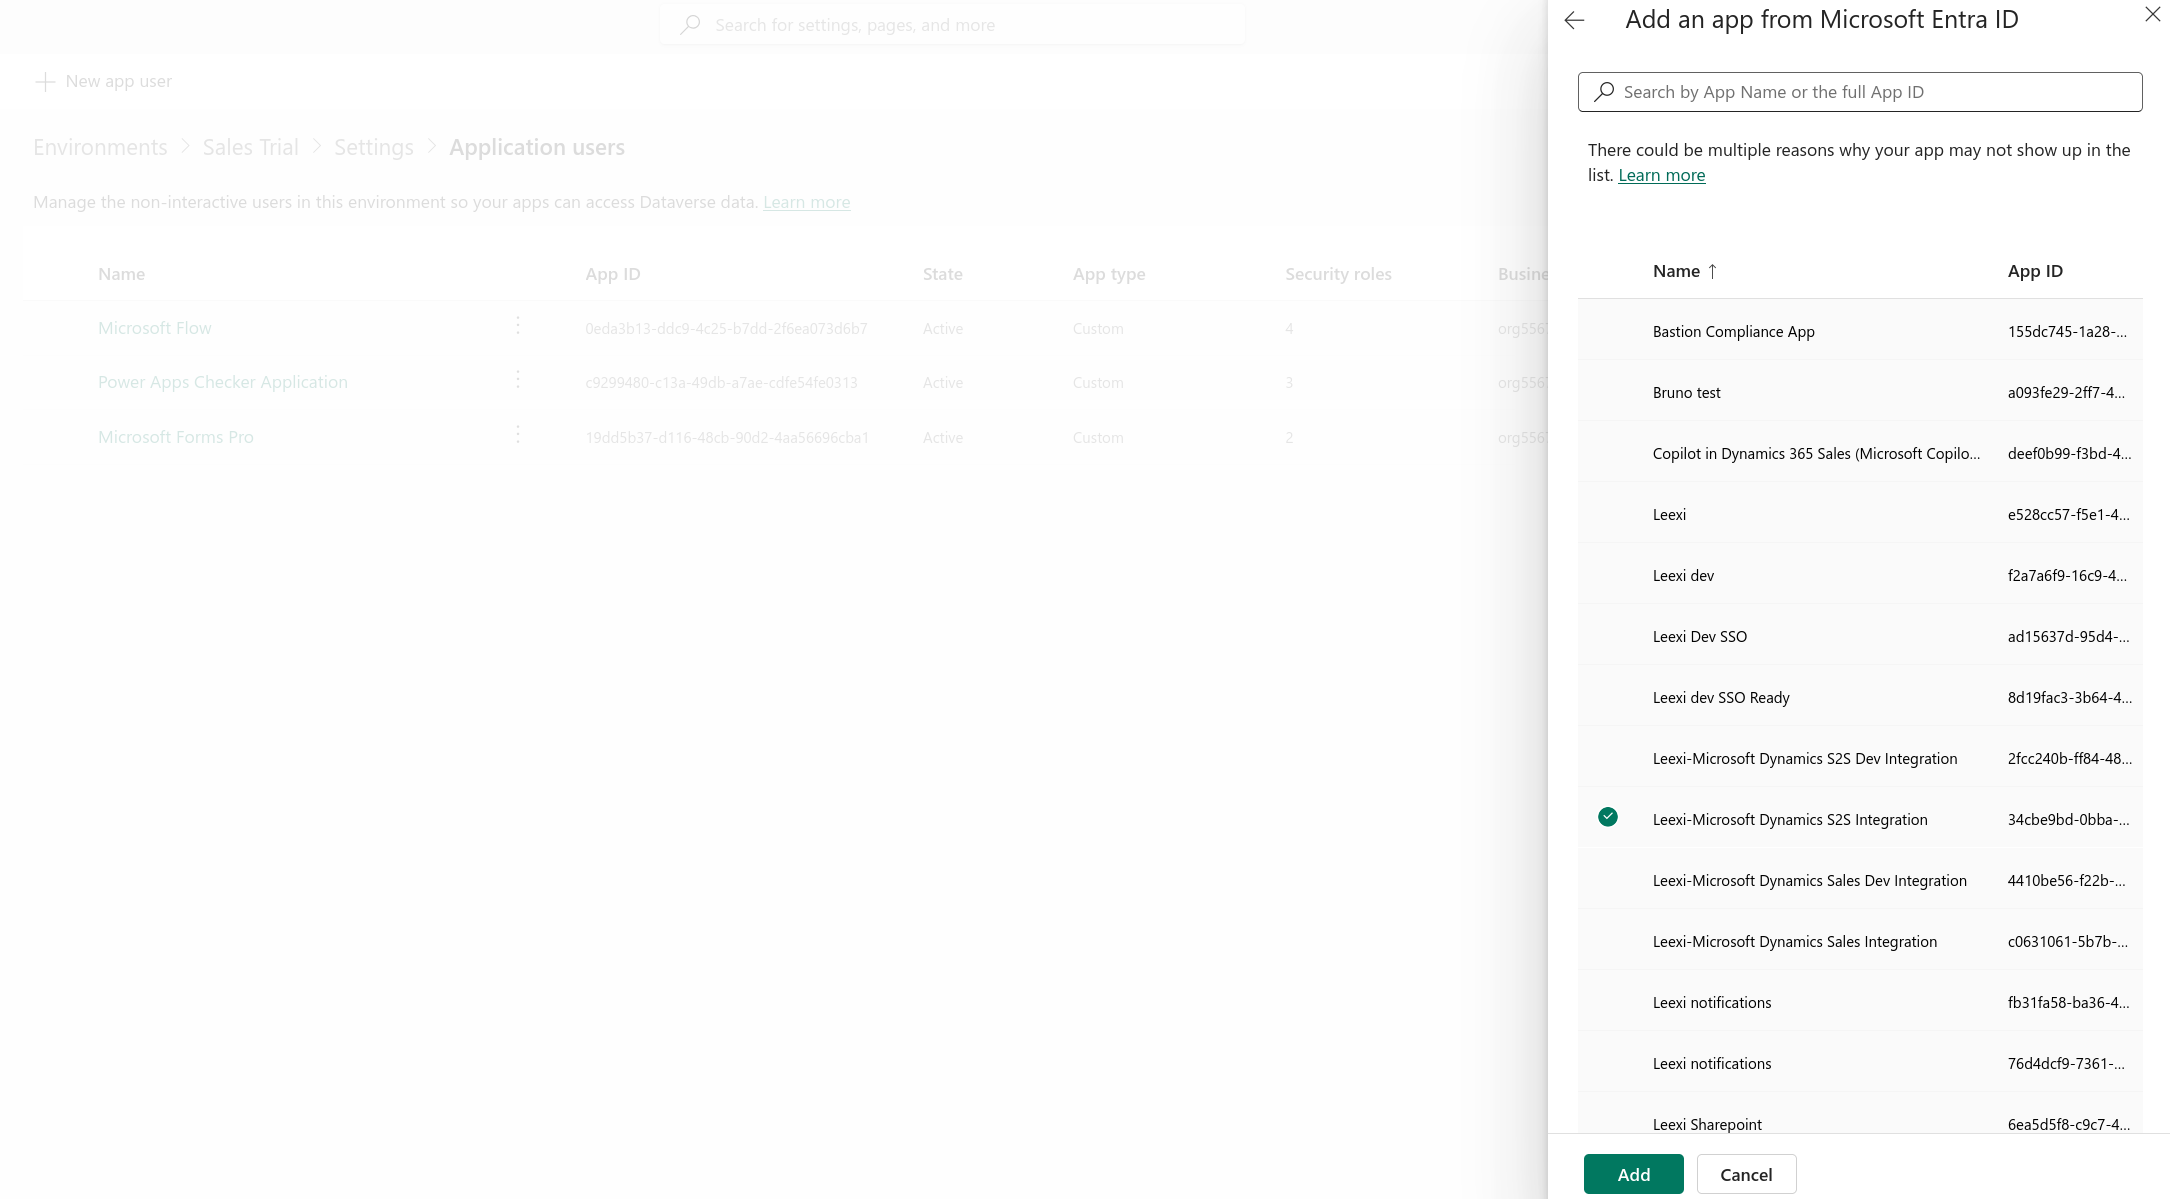
- Click + Add an app and search for the following Client ID:
34cbe9bd-0bba-4c64-abfa-ab6b73fecb5d(Leexi-Microsoft Dynamics S2S Integration). If the application doesn't appear, check that the first step was completed correctly.
- Select your Business Unit (usually the root business unit).
- Click Create.
Assign a security role
The application user needs permissions to create and update notes (annotations) in Dynamics.
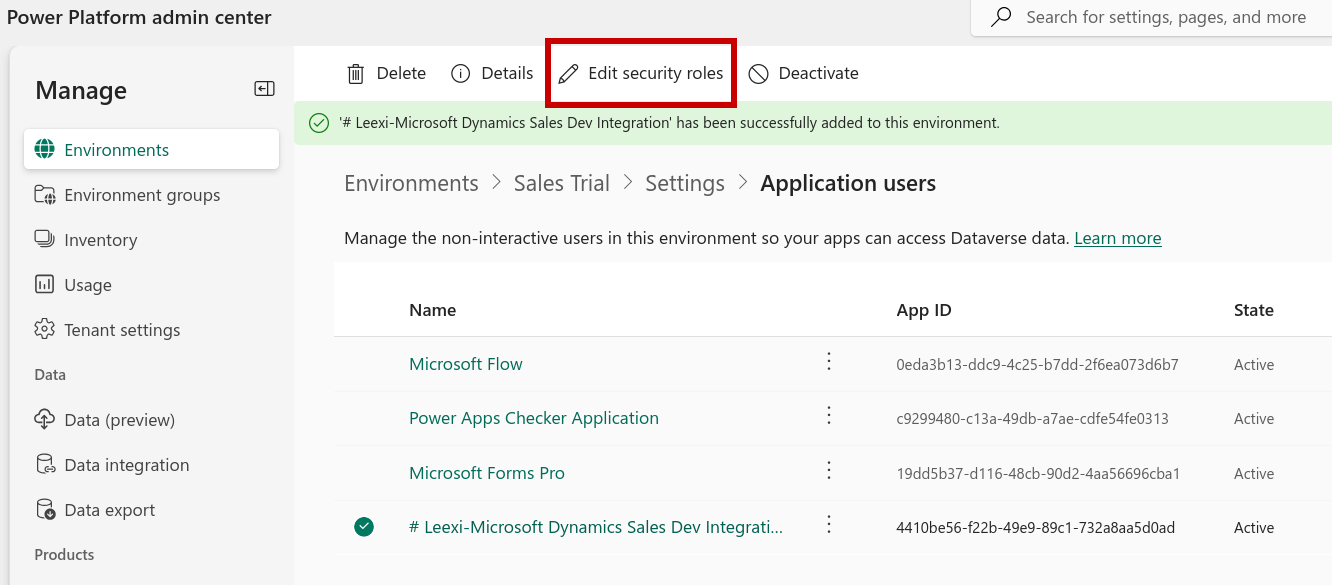
- In the Application users list, find the Leexi user you just created.
- Click it, then click Edit security roles.
- Assign one of the following combinations:
- Delegate + Salesperson + System admin;
- Delegate + a custom security role with at least the following privileges:
prvActOnBehalfOfAnotherUser, prvReadAttribute, prvReadEntity, prvWriteContact, prvReadContact, prvWriteAccount, prvReadAccount, prvWriteOpportunity, prvReadOpportunity, prvWriteLead, prvReadLead, prvReadNote, prvWriteNote, prvCreateNote. These privileges must be granted at the organization level (Global), or at least at the business unit level.access is required for the CRM field autofill feature.
- Click Save.
Enable the integration in Leexi
- Log in to Leexi and go to Settings → Integrations.
- Find Microsoft Dynamics and click Add.
- Enter the URL of your Dynamics environment (e.g.
https://yourorg.crm4.dynamics.com). - Click Submit.
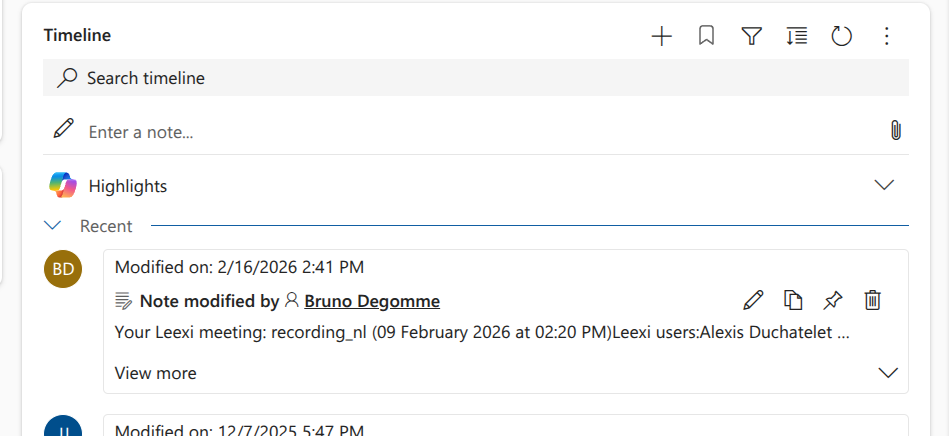
Done! Your CRM information is now synced with Leexi and call notes appear in the timeline of your deals, leads, contacts, and organizations.
Going further
Saving notes on appointments
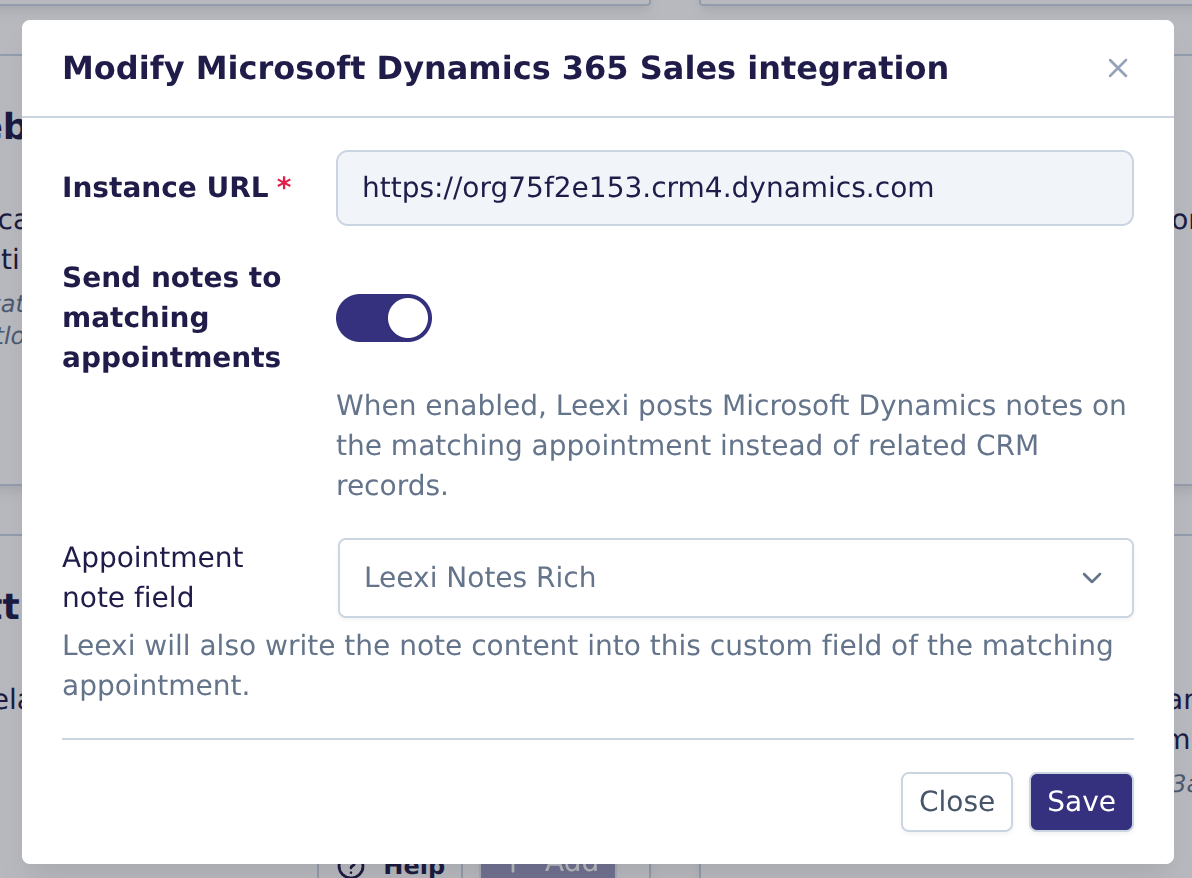
You may prefer your notes to appear on your appointments rather than on your deals, leads, contacts, and organizations. In that case, when enabling the integration, select the option to send notes to the corresponding appointments.
This option requires the additional permissions prvReadActivity, prvAppendToActivity, prvCreateActivity, and prvWriteActivity on the service account.
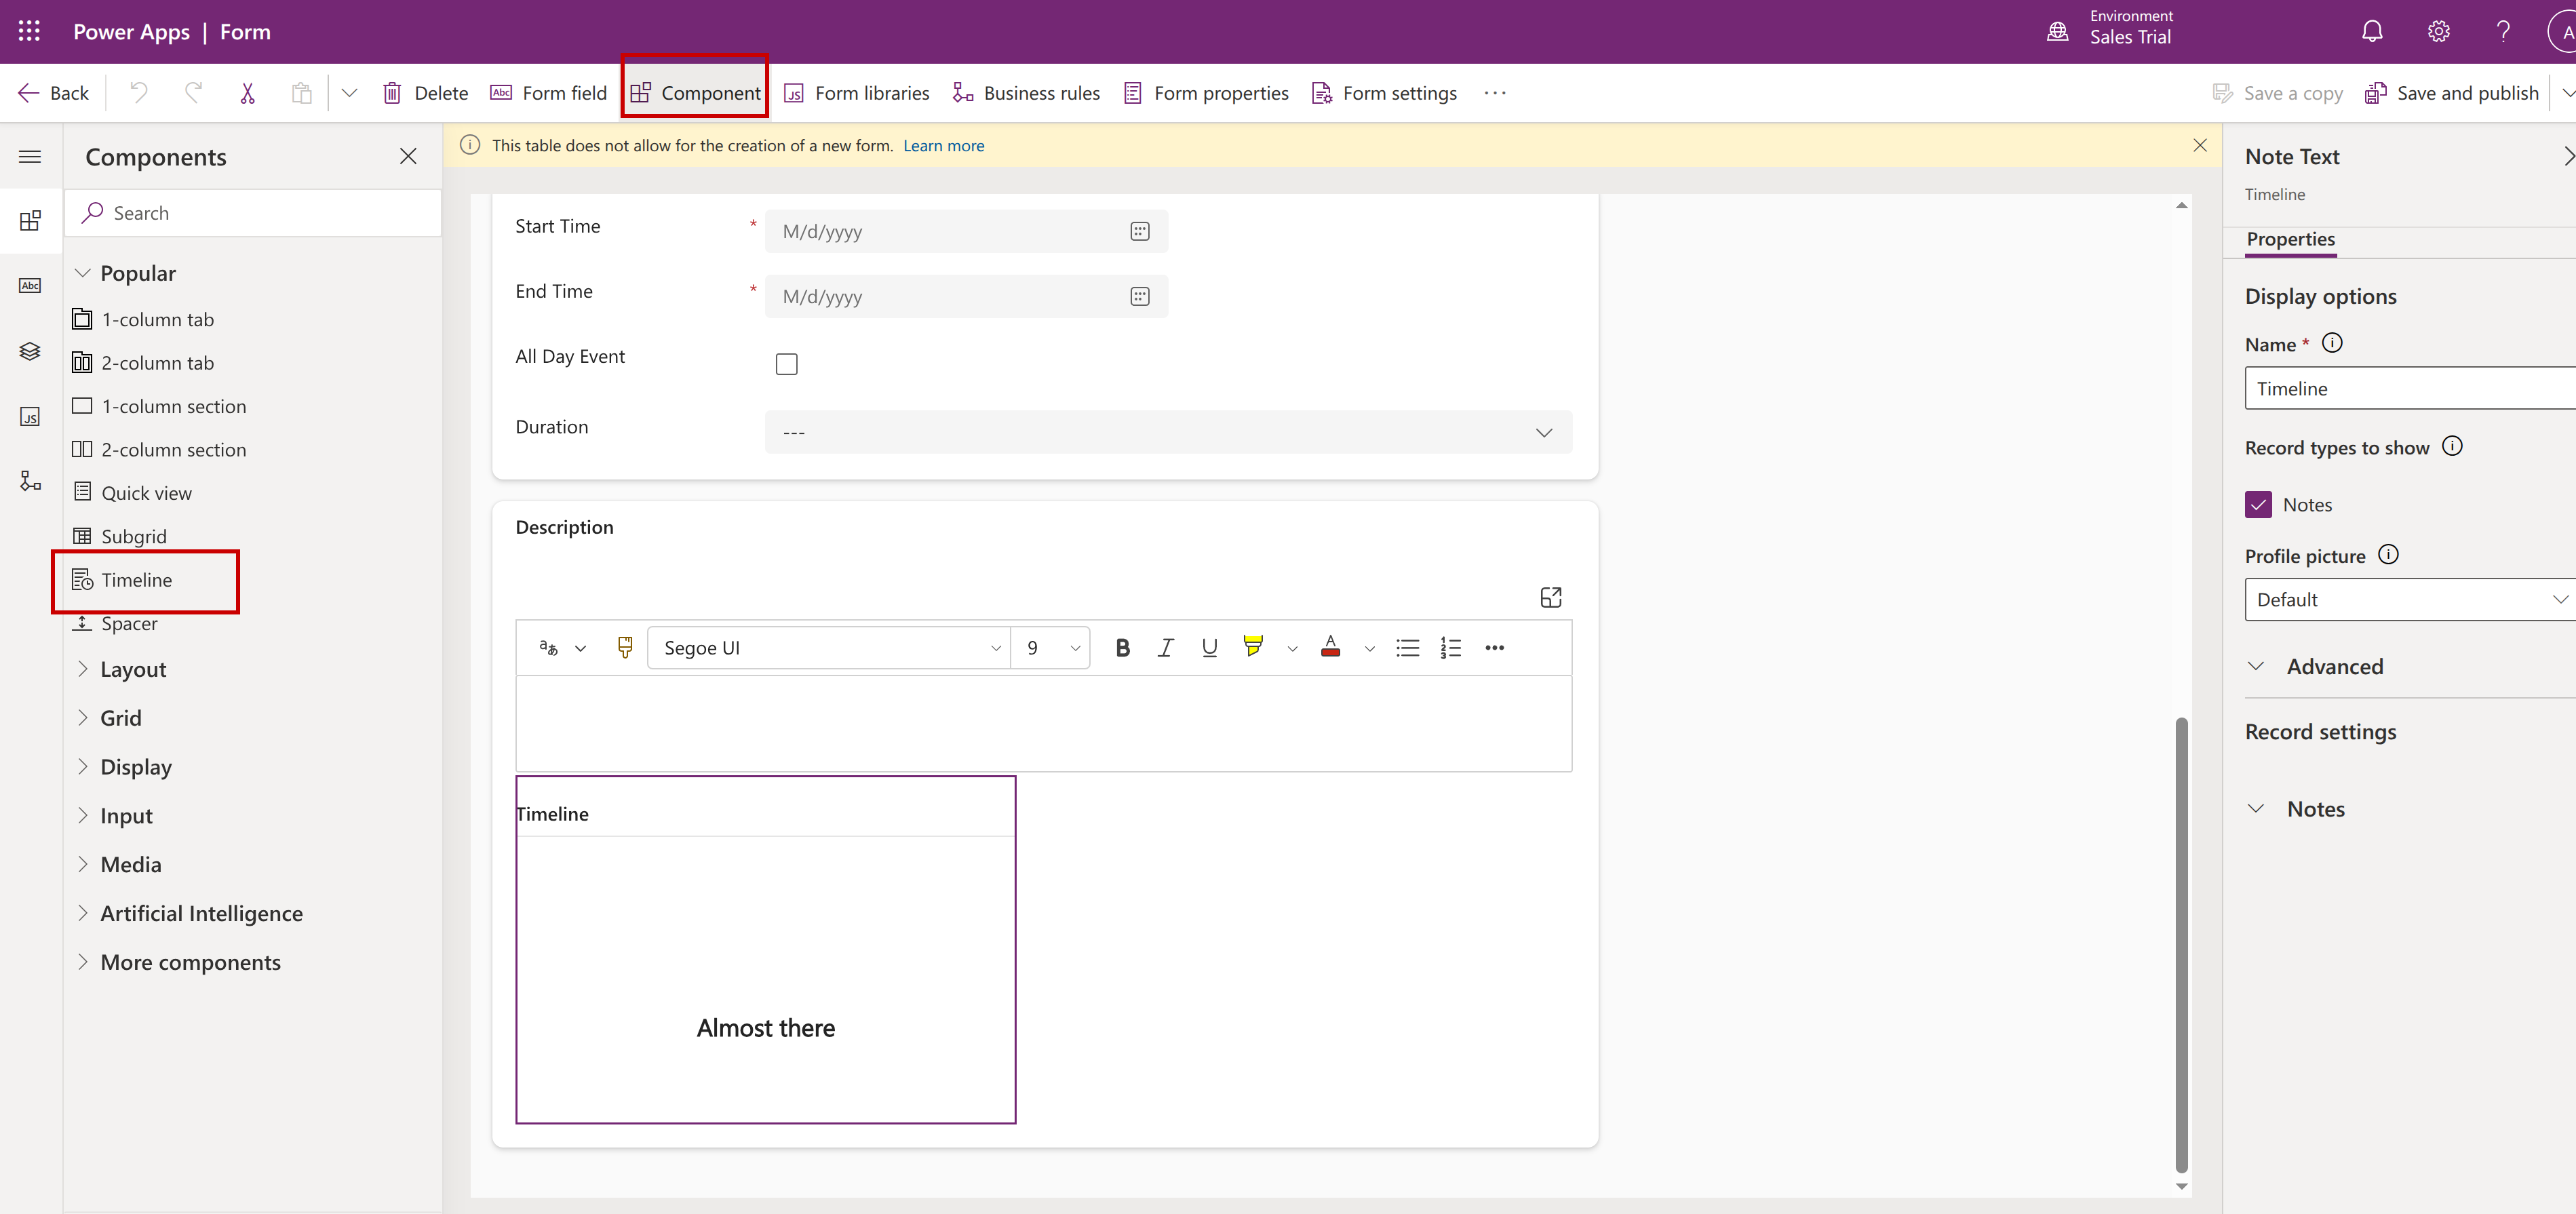
Then click Save and select the note field that Leexi should fill with the meeting summary. To do this, first create a custom field of type Rich Text on your Appointment table.
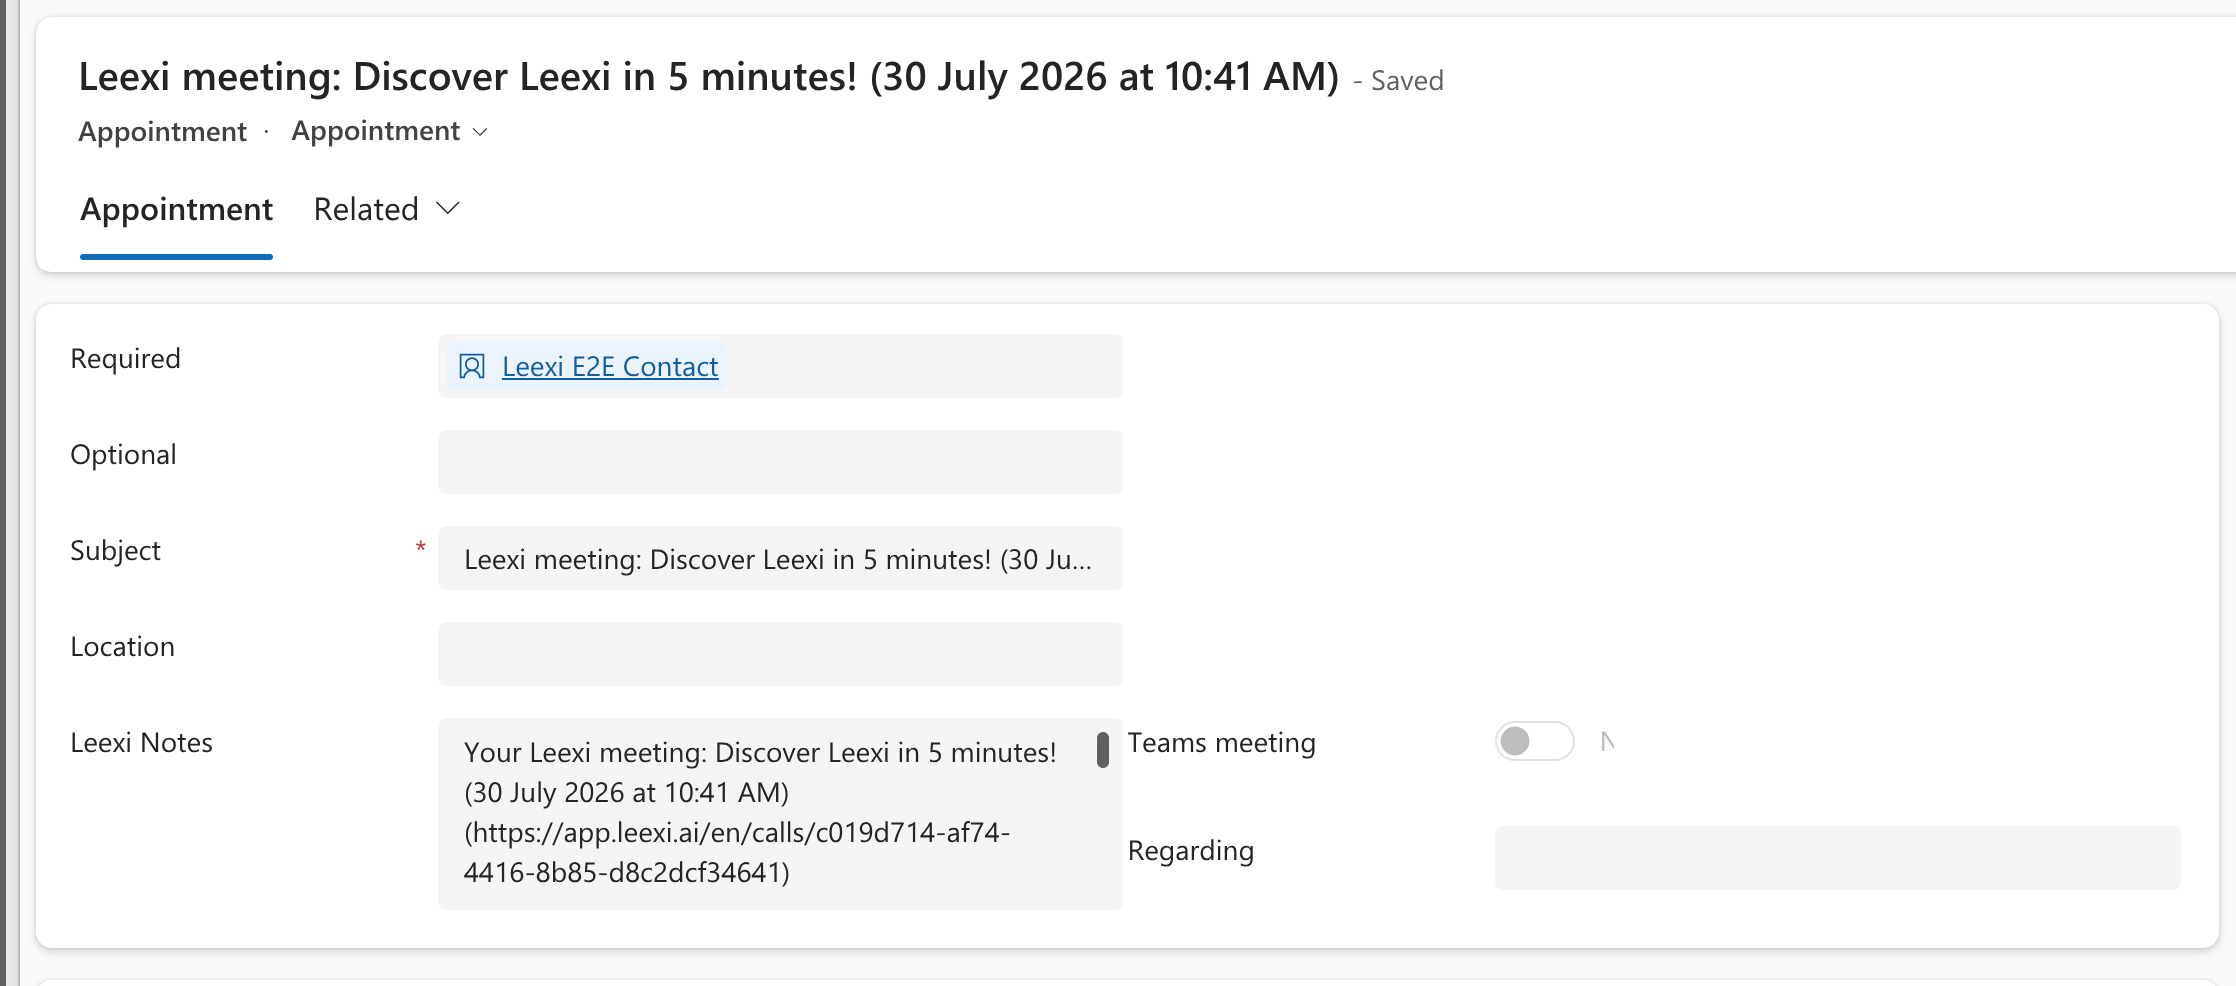
For every Leexi meeting, Leexi finds the corresponding appointment and updates this note field with the meeting summary. For meetings and calls without a matching appointment, Leexi creates the appointment.
Things to watch out for
- Write access on the security role is required for CRM field autofill.
- With the option to send notes to appointments, Leexi calls without an associated appointment (mobile recordings, ad hoc meetings) result in Leexi creating the corresponding appointment.